Japanese
 | Client Settings (Windows PuTTY) |
Last updated on: 2014/10/15
Notice and disclaimer:
At our own initiative, we looked at the SSH login method to a server using public-key authentication from some client platforms.
In this page, we provide an example setting on Windows PuTTY.
The illustrations are intended only for the user’s convenience and do NOT represent any endorsement. We do not provide support for these methods because actual behavior strongly depends on each server or client computer. Please forward any question to your server administrator, the network vendor or the developer/distributor.
Download PuTTY » Download
1: Generate keys
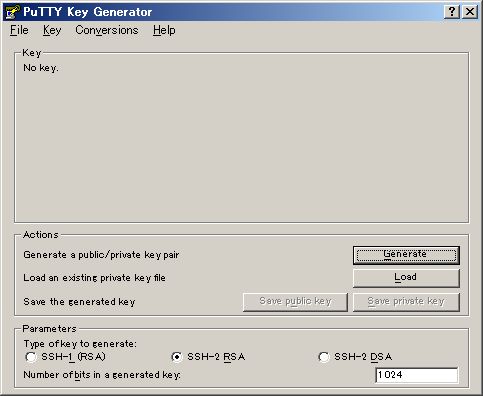
- Start “PUTTYGEN” which you can find usually in a folder you decompressed or installed PuTTY.
- The below dialog box will be displayed. Select the type of key and click the Generate button.
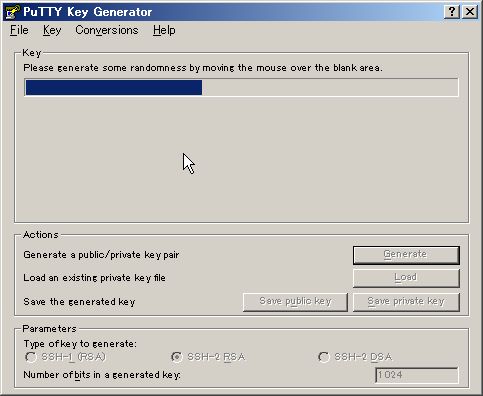
- As you keep moving the cursor on the dialog box, key generation proceeds.
- After the completion of key generation, the below dialog box will be displayed. Enter key passphrases twice.
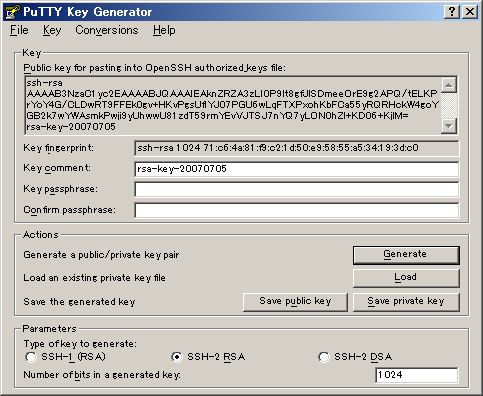
- If your ssh host is “OpenSSH”, Select all letters shown in the box just below “Public key for pasting into authorized_keys file:” and pasting it in a one-line format into a certain file with an appropriate name as Public key.
** If your ssh host is “SSH2” of ssh.com’s, Just click the Save public key button to save the public key file with an appropriate name.
- Next, click the Save private key button to save the private key file at a place where other people cannot read it. (The private key file must be kept confidential.)
2: Copy the public key file to SSH host
If you are not able to perform the following procedures for the reasons that the host you wish to access supports only public key authentication or that it does not support FTP, ask the server administrator to copy your public key file to the host.
- Access the host and copy the public key file to the “.ssh” directory (do not forget the dot) of your home directory (“$HOME/.ssh” or “~/.ssh”).
- Since it is a public key file, you do not have to worry about transferring method.
- If the “.ssh” directory does not exist in the host computer, you need to make it. Confirm that the owner of the directory is set as yourself and your group and set the mode as “700”.
- Change the name of the public key file to “authorized_keys”. Confirm that the owner of the file is set as yourself and your group, and set mode as “644”.
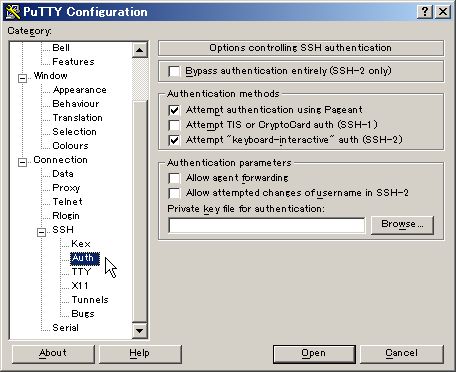
3: Configure PuTTY
- Start PuTTY and enter host information.
- Select SSH – Auth
- Click the Browse button and select the private key file you generated in the “1: Generate keys”.