Japanese
 | Windows Live Mail |
Basic Configuration of Windows Live Mail
Follow the instructions below to create account of Postman on Windows Live Mail. This tutorial is made using Windows Live Mail 2011. Screen design may be different depending on software version.
Basic Configuration
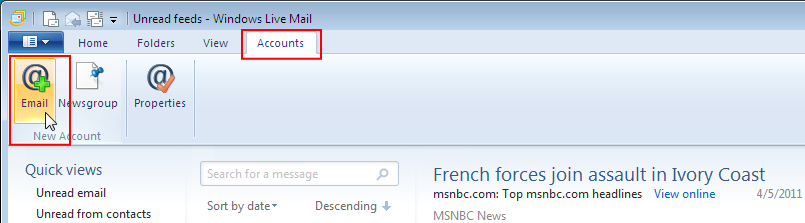
- Select Email in the Accounts tab.
- Give your account information. Fill in as follows and click Next.
(1) Email address:
Your Postman email address (2) Password:
Your Postman password (3) Remember this password
At your will
(If you leave this checkbox unchecked, you will be asked to enter your password every time you check for new messages.)(4) Display name for your sent messages:
Name you want to display in the From: field in messages you send 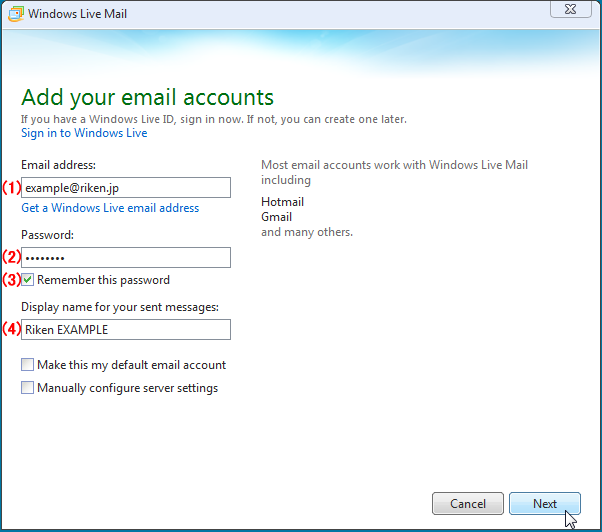
- Specify server configuration. The values to be filled in depend on which protocol ( POP or IMAP ) you use to get messages.
- To use POP ( Post Office Protocol ), fill in as follows and click Next.
(1) Server type:
POP (2) ( Incoming ) Server address:
postman.riken.jp (2) ( Incoming ) Port:
995
Automatically set to this value when you place a checkmark next to “Requires a secure connection ( SSL )“(3) Authenticate using:
Clear text (4) ( Outgoing ) Server address:
postman.riken.jp (4) ( Outgoing ) Port:
465 (4) “Requires a secure connection ( SSL )”
ON
With certain versions of “Windows Live Mail”, the value of “(4) ( Outgoing ) Server Port:” will be overwritten to “25” when you take action on this option. It is due to the design of the product. So, please RE-CONFIRM that the value of “(4) ( Outgoing ) Server Port:” is “465” AFTER you take any action on this option.(4) “Requires authentication”
ON 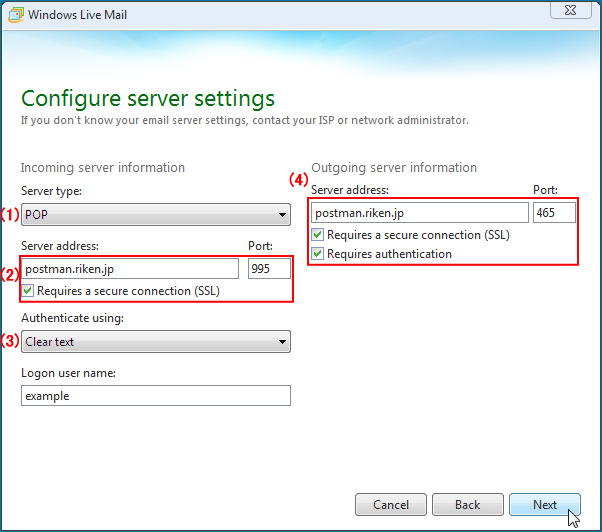
- To use IMAP ( Internet Message Access Protocol ), fill in as follows and click Next.
(1) Server type:
IMAP (2) ( Incoming ) Server address:
postman.riken.jp (2) ( Incoming ) Port:
993
Automatically set to this value when you place a checkmark next to “Requires a secure connection ( SSL )“(3) Authenticate using:
Clear text (4) ( Outgoing ) Server address:
postman.riken.jp (4) ( Outgoing ) Port:
465 (4) “Requires a secure connection ( SSL )”
ON
With certain versions of “Windows Live Mail”, the value of “(4) ( Outgoing ) Server Port:” will be overwritten to “25” when you take action on this option. It is due to the design of the product. So, please RE-CONFIRM that the value of “(4) ( Outgoing ) Server Port:” is “465” AFTER you take any action on this option.(4) “Requires authentication”
ON 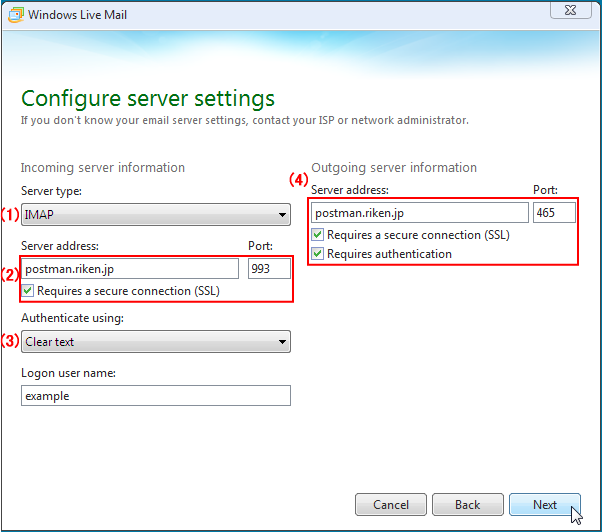
- To use POP ( Post Office Protocol ), fill in as follows and click Next.
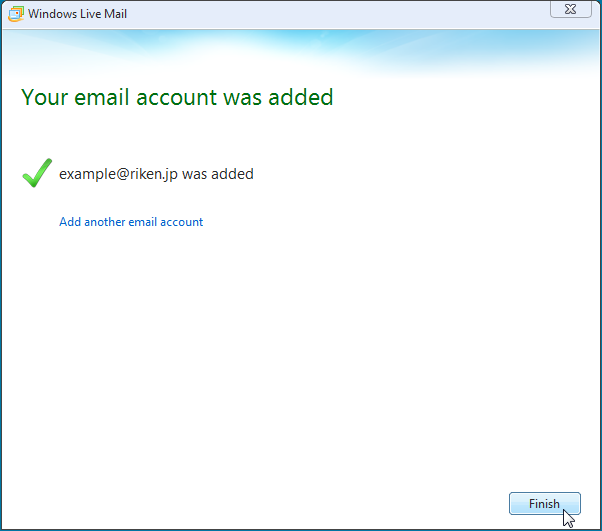
- Your email account has been added. Click Finish.
Please check out below if you cannot send or receive message.
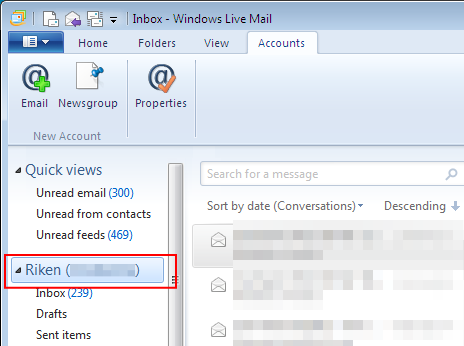
- Select the Postman account to check out.
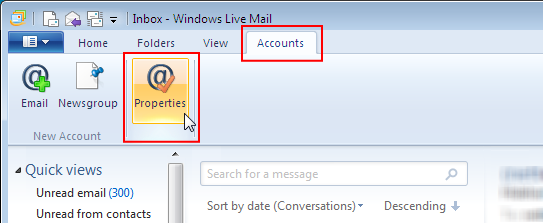
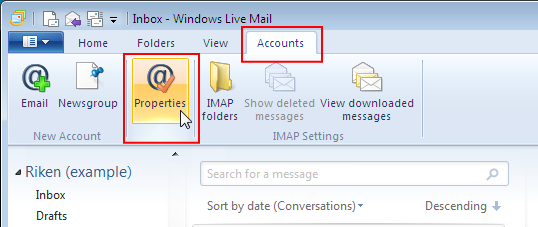
- Select Properties in the Accounts tab.
- POP account view
- IMAP account view
- POP account view
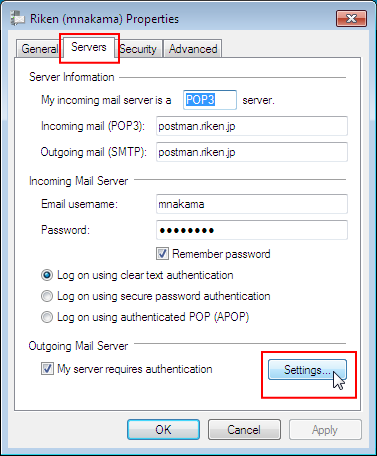
- Check out the following information in the Servers tab.
- POP account view

- IMAP account view
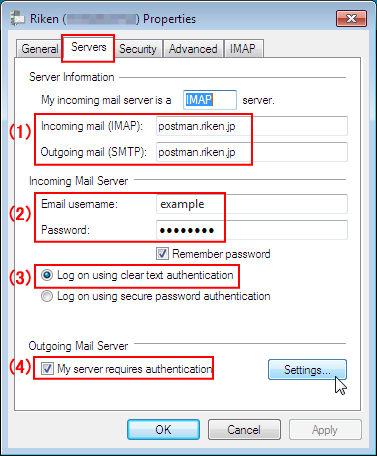
(1) Server names are correct (2) User name and password are correct (3) “Log on using clear text authentication” is selected (4) “My server requires authentication” is checked - POP account view
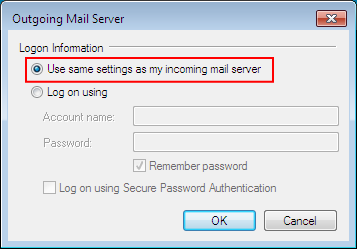
- Check out if login information for outgoing mail server is correct. Click Settings… button in the Servers tab
- POP account view
- IMAP account view

- POP account view
- Check out that Use same settings as my incoming mail server is applied for Login information.
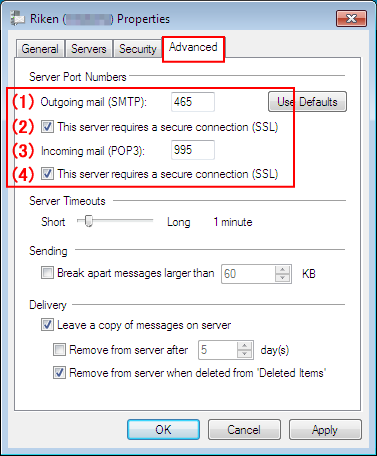
- Check out the following information in the Advanced tab
- POP account view
- IMAP account view
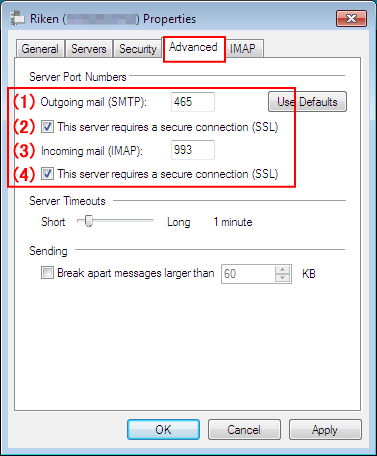
(1) Outgoing mail server port number : 465 for both POP and IMAP
There is a sending failure issue due to this value overwritten to “25”. Please re-confirm this field AFTER placing a checkmark on (2) below.(2) The server requires a secure connection (SSL) is checked
The value of (1) will be overwritten to “25” when you take action on this option. It is due to the design of Live Mail. So, be sure to confirm the port number in (1) after you take any action on this option.(3) Incoming mail server port number : 995 for POP, 993 for IMAP (4) The server requires a secure connection (SSL) is checked - POP account view