Japanese
 | Thunderbird3 |
Basic Configuration of Thunderbird 3
Follow the instructions below to create account of Postman on Thunderbird. This tutorial describes using Thunderbird 3.1.10. on 32bit Windows 7. Screen design may be different depending on version of OS or e-mail software.
Download Thunderbird » http://www.mozilla.com/en-US/thunderbird/
Basic configuration of Thunderbird 3
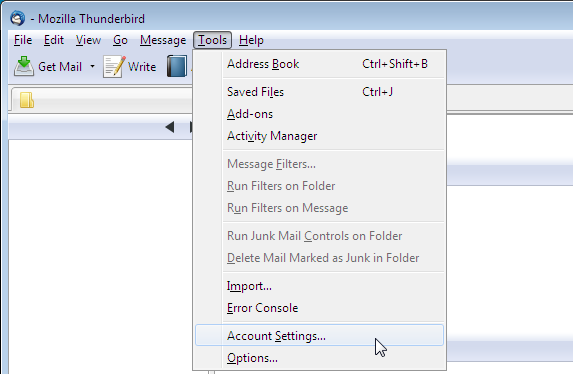
- Go “Tools” – “Account Settings…“
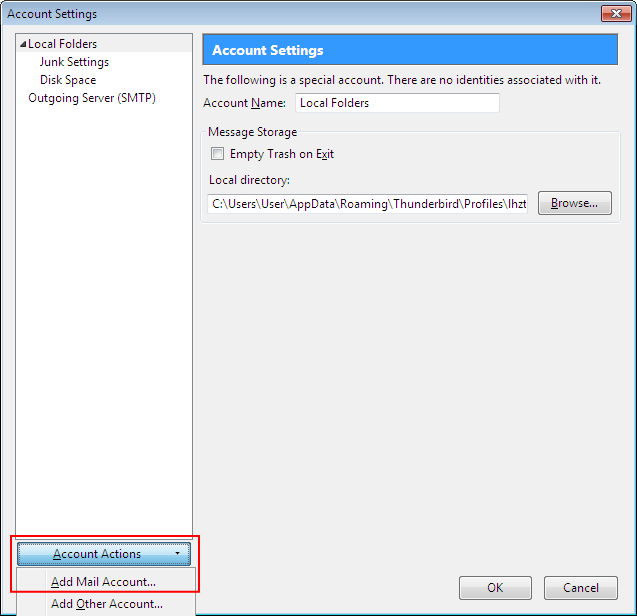
- Select “Add Mail Account…” from the pull-down of “Account Actions“.
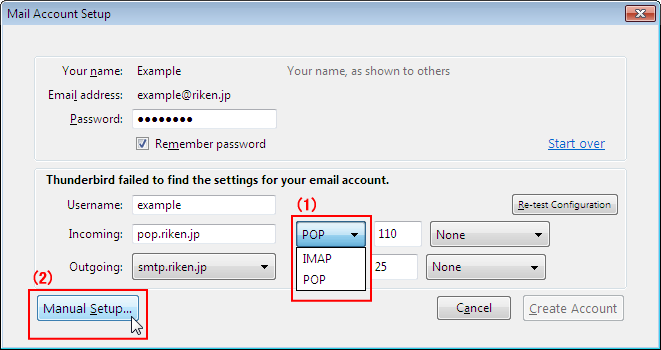
- Give your account information. Fill in as follows and click “Continue“.
(1) Your name
which is shown to others as “Your name” (2) Email address
Your Postman email address (3) Password
Your Postman password (4) Remamber password
at your will
(If you leave this checkbox unchecked, you will be asked to enter your password every time you check for new messages.)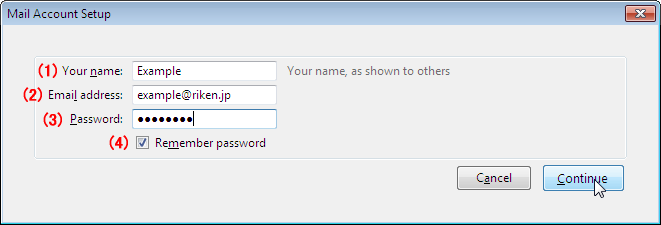
- (1) Determine the server type ( POP or IMAP ) you want to use to get messages and click (2) “Manual Setup…“.
- Specify (Incoming) server configuration. This depends on which protocol ( POP or IMAP ) you want to use to get messages. Select “Server Settings” on the left pane.
- To use POP ( Post Office Protocol ), confirm that the “Server Type:” is POP Mail Server and fill in as follows.
(1) Server Name:
postman.riken.jp (2) Connection security:
SSL/TLS (3) Authentication method:
Normal password (4) Port:
995
Automatically set to this value when select “SSL/TLS” at (2).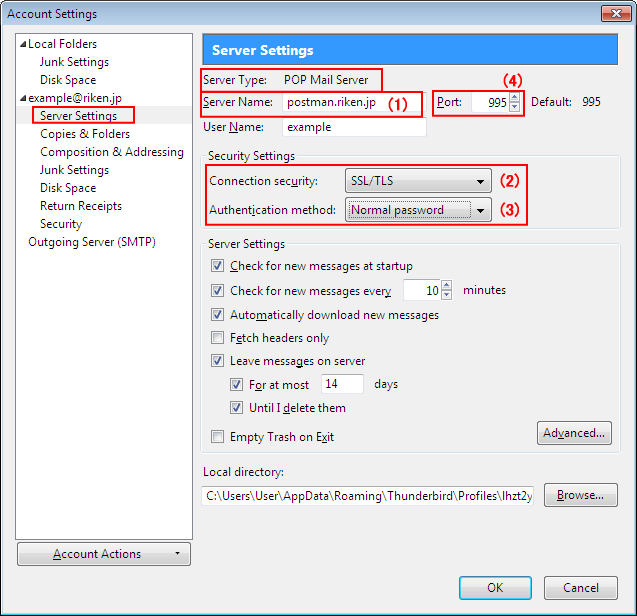
- To use IMAP ( Internet Message Access Protocol ), confirm that the “Server Type:” is IMAP Mail Server and fill in as follows.
(1) Server Name:
postman.riken.jp (2) Connection security:
SSL/TLS (3) Authentication method:
Normal password (4) Port
993 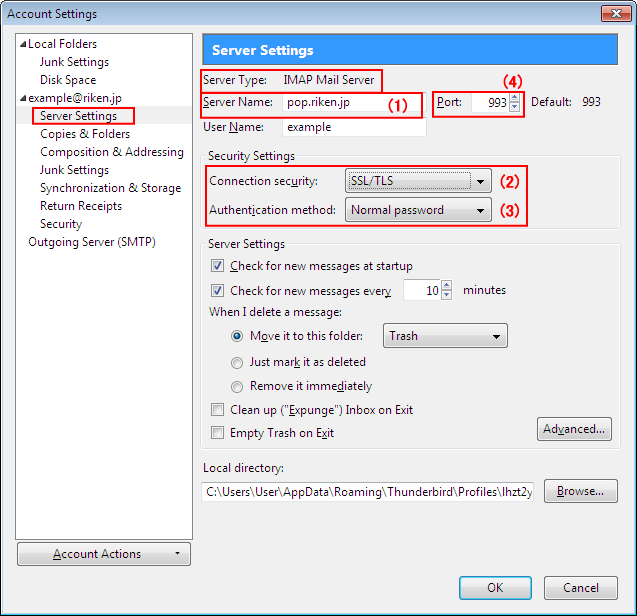
- To use POP ( Post Office Protocol ), confirm that the “Server Type:” is POP Mail Server and fill in as follows.
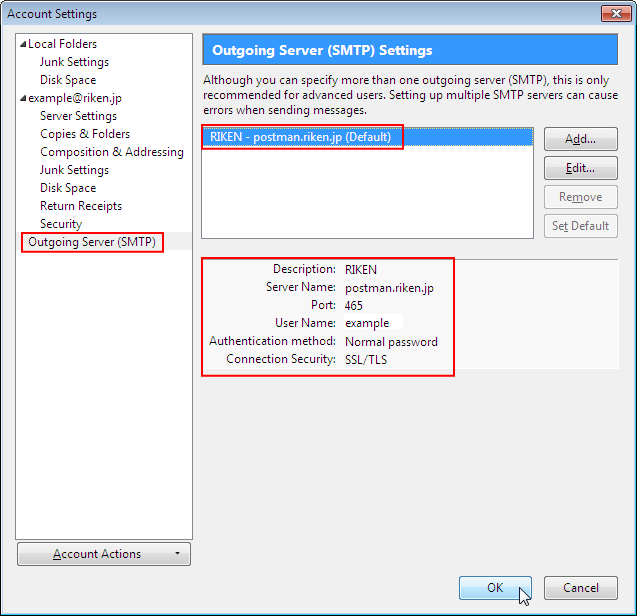
- Specify Outgoing Server configuration.
(1) Select “Server Settings” on the left pane. (2) Select smtp.riken.jp (Default)(3) Server configuration is in default , so (4) click “Edit…” to change it.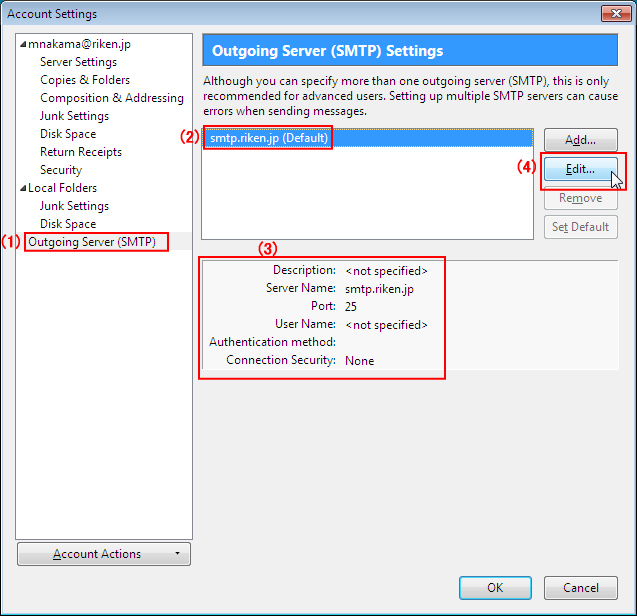
- Fill in as follows and click “OK“.
(1) Server Name:
postman.riken.jp (2) Connection security:
SSL/TLS (3) Port:
465
Automatically set to this value when select SSL/TLS at (2).(4) Authentication method:
Normal password (5) User Name:
Your Postman User Name ( xxxx part of you email address xxxx@riken.jp ) (6) Authentication method:
Normal password 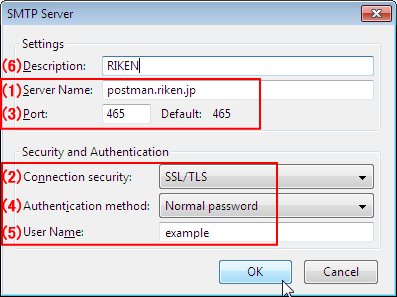
- Confirm that the Outgoing Server Setting is configured correctly and click OK to complete basic settings.